
Capacitive Soil Moisture Sensor
Summary
Traditional soil moisture sensors are prone to corrosion with a limited lifespan regardless of measures taken.
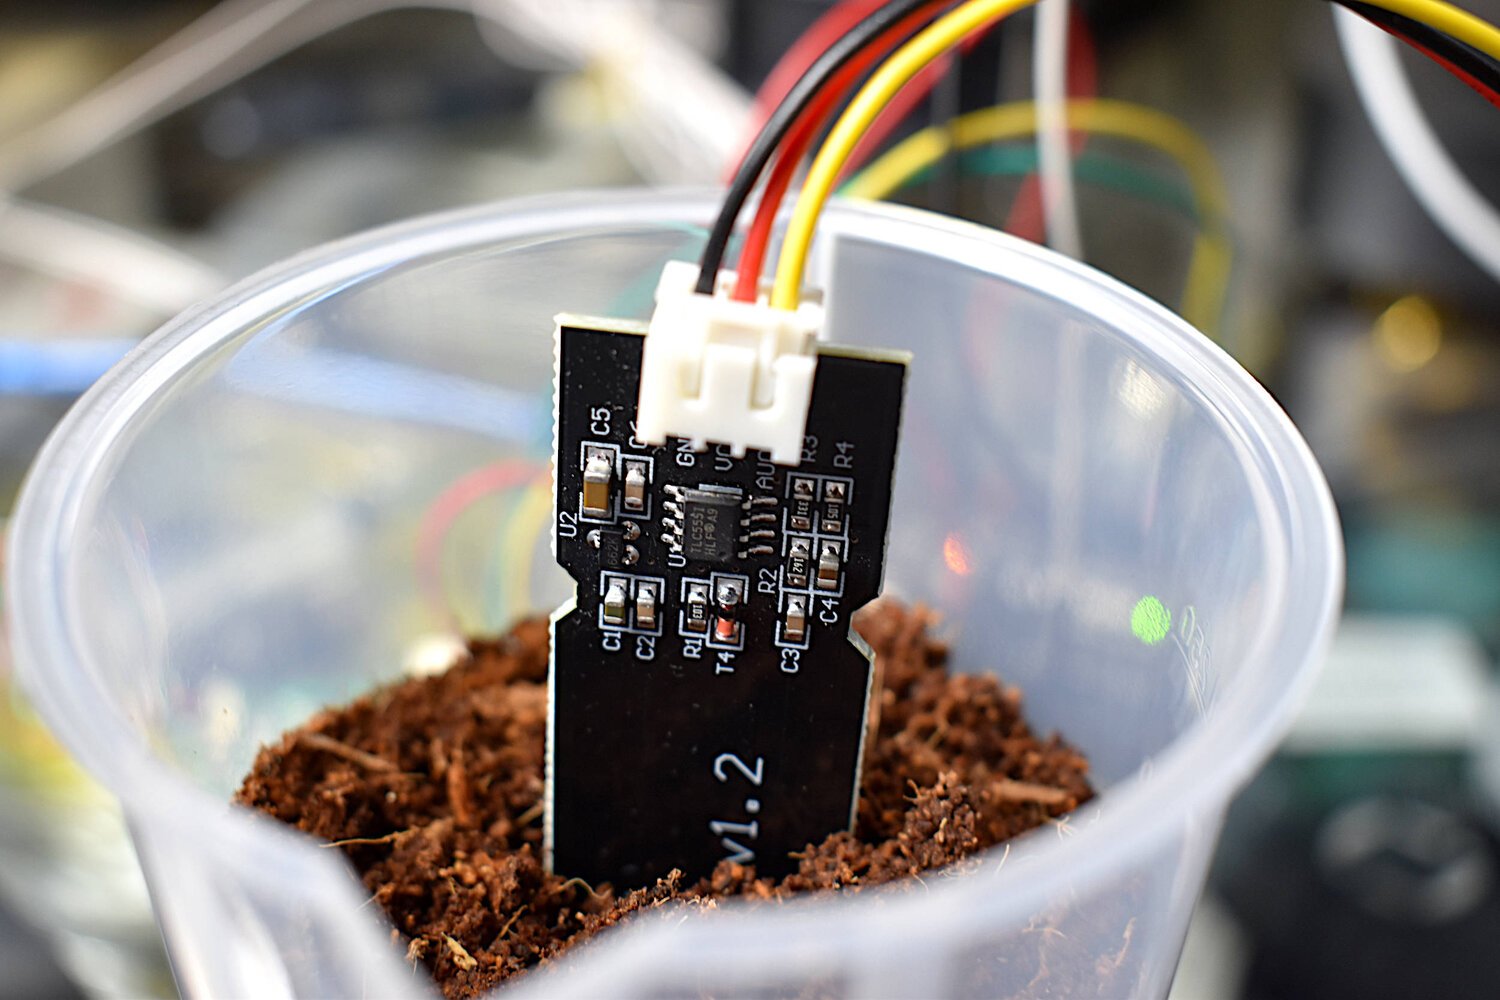
This capacitive soil moisture sensor features no exposed plating and uses capacitive sensing to detect soil moisture. The result is a much more robust sensor without corrosion worries.
There are some excellent tutorials with guides to the theory, use and calibration of this capacitive soil moisture sensor, for example:
https://makersportal.com/blog/2020/5/26/capacitive-soil-moisture-calibration-with-arduino
https://www.instructables.com/Soil-Moisture-Sensor-Calibration/
One technique is to use a gravimetric technique to calibrate capacitive-type electromagnetic soil moisture sensors. Capacitive soil moisture sensors exploit the dielectric contrast between water and soil, where dry soils have a relative permittivity between 2-6 and water has a value of roughly 80. Accurate measurement of soil water content is essential for applications in agronomy and botany - where the under- and over-watering of soil can result in ineffective or wasted resources. With water occupying up to 60% of certain soils by volume, depending on the specific porosity of the soil, calibration must be carried out in every environment to ensure accurate prediction of water content. An Arduino can be used to read the analog signal from the capacitive sensor, which can be calibrated to volumetric soil moisture content via gravimetric methods (using volume and weight of dry and wet soil). Alternatively there are autocalibration approaches

How Does a Capacitive Moisture Sensor Work?
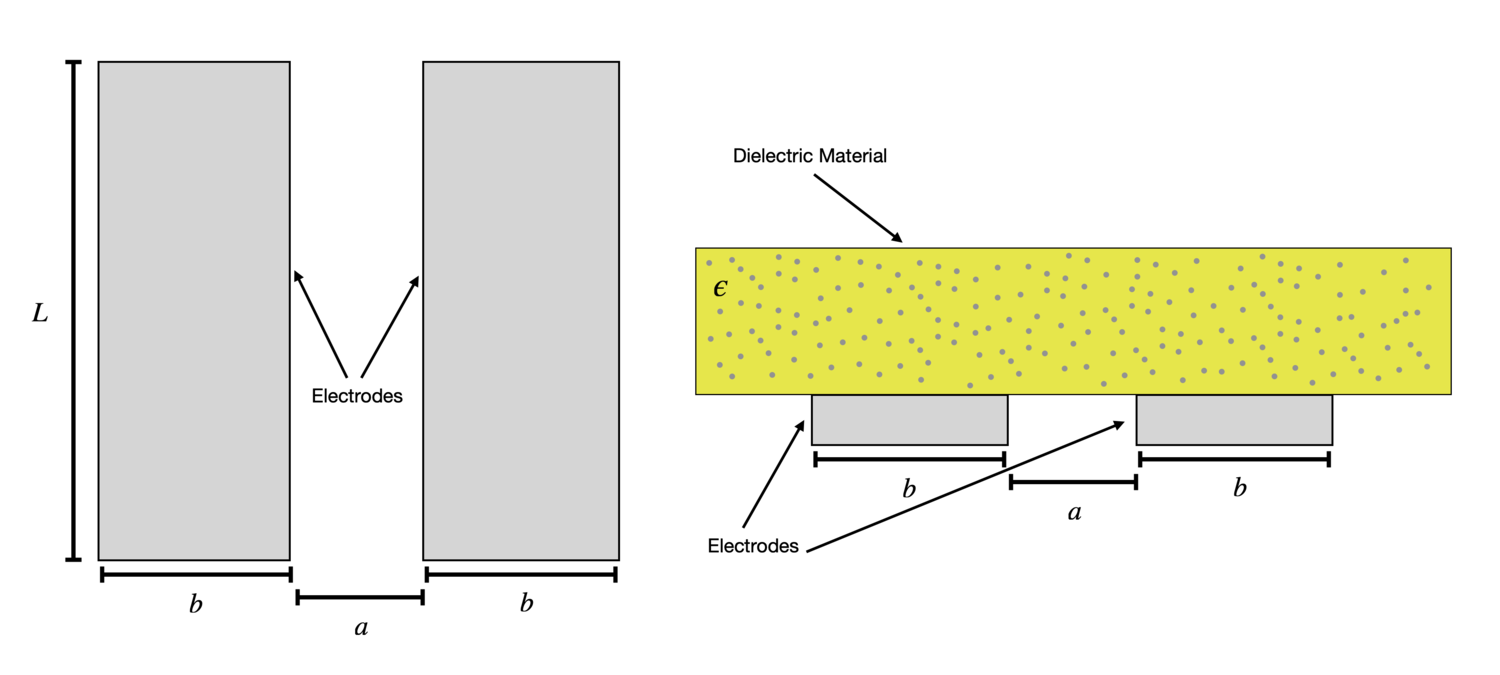
Simply stated, a capacitor stores electrical charge. The electrical component known as a capacitor consist of three pieces. A positive plate, a negative plate and the space in-between the plates, known as the dielectric. The physical form and construction of practical capacitors vary widely and many capacitor types are in common use. Most capacitors contain at least two electrical conductors often in the form of metallic plates or surfaces separated by a dielectric medium.
https://makersportal.com/blog/2020/5/26/capacitive-soil-moisture-calibration-with-arduino
A capacitive moisture sensor works by measuring the changes in capacitance caused by the changes in the dielectric. It does not measure moisture directly (pure water does not conduct electricity well), instead it measures the ions that are dissolved in the moisture These ions and their concentration can be affected by a number of factors, for example adding fertilizer for instance will decrease the resistance of the soil. Capacitive measuring basically measures the dielectric that is formed by the soil and the water is the most important factor that affects the dielectric.
Capacitive measuring has some advantages, It not only avoids corrosion of the probe but also gives a better reading of the moisture content of the soil as opposed to using a resistive soil moisture sensor. Since the contacts (the plus plate and the minus plate of the capacitor) are not exposed to the soil, there is no corrosion of the sensor itself.

Hardware schematic for capacitive soil moisture sensor
Soil and sensor form a capacitor where the capacitance varies according to the water content present in the soil. The capacitance is converted into voltage level basically from 1.2V to 3.0V maximum.
There is a fixed frequency oscillator that is built with a 555 Timer IC. The square wave generated is then fed to the sensor like a capacitor. To a square wave signal that capacitor, however, has a certain reactance, or for argument’s sake a resistance that forms a voltage divider with a pure ohm type resistor (the 10k one on pin 3). The greater is the soil moisture, the higher the capacitance of the sensor. Consequently, there is a smaller reactance to the square wave, thus lowering the voltage on the signal line. The voltage on the Analog signal pin can be measured by an analog pin on the Arduino which represents the humidity in the soil.
The capacitance of the sensor is measured by means of a 555 based circuit that produces a voltage proportional to the capacitor inserted in the soil. One can then measure this voltage by use of an Analog to Digital Converter (ADC), which produces a number that we can then interpret as soil moisture. The final output value is affected by probe insertion depth and how tight the soil packed around it is. Value_1 is the value for dry soil and Value_2 is the value for saturated soil.
For example: Value_1 = 520; Value_2 = 260.
The range will be divided into three sections: dry, wet, water. Their related values are:
Dry: (520 430]
Wet: (430 350]
Water: (350 260]
Assuming linearity, you can convert these values to a “percent” of water. Just remember, in reality, Dry is not 0% moisture and “Water” may not be 100% moisture, at least at the lower values. Still, it is a useful measurement.
(modified from: https://www.switchdoc.com/2020/06/tutorial-capacitive-moisture-sensor-grove/)
Using the capacitive sensor with an Arduino is simple as the Arduino has a built in 10 bit ADC. The sensor has a built-in voltage regulator that supports 3.3V, meaning it can work with a 3.3V development board as well as 5V. It is recommended that 3.3V power be used if available, to maximise resolution of the ADC.
Sensor type: Analogue
Operating voltage: 3.3 VDC
Output voltage: 0-3.0 VDC
Interface: PH2.54 3-pin
How to Connect
To connect to the Grove board:
Connect top plug wire (GND) to (GND)
Connect second plug wire (VCC) to 3.3V
Connect bottom plug wire (AOUT) to an analogue port on the Arduino board (e.g. A1)


Test patch:
Notes
Sensor use and calibration: https://how2electronics.com/interface-capacitive-soil-moisture-sensor-arduino/
Theory and calibration: https://makersportal.com/blog/2020/5/26/capacitive-soil-moisture-calibration-with-arduino
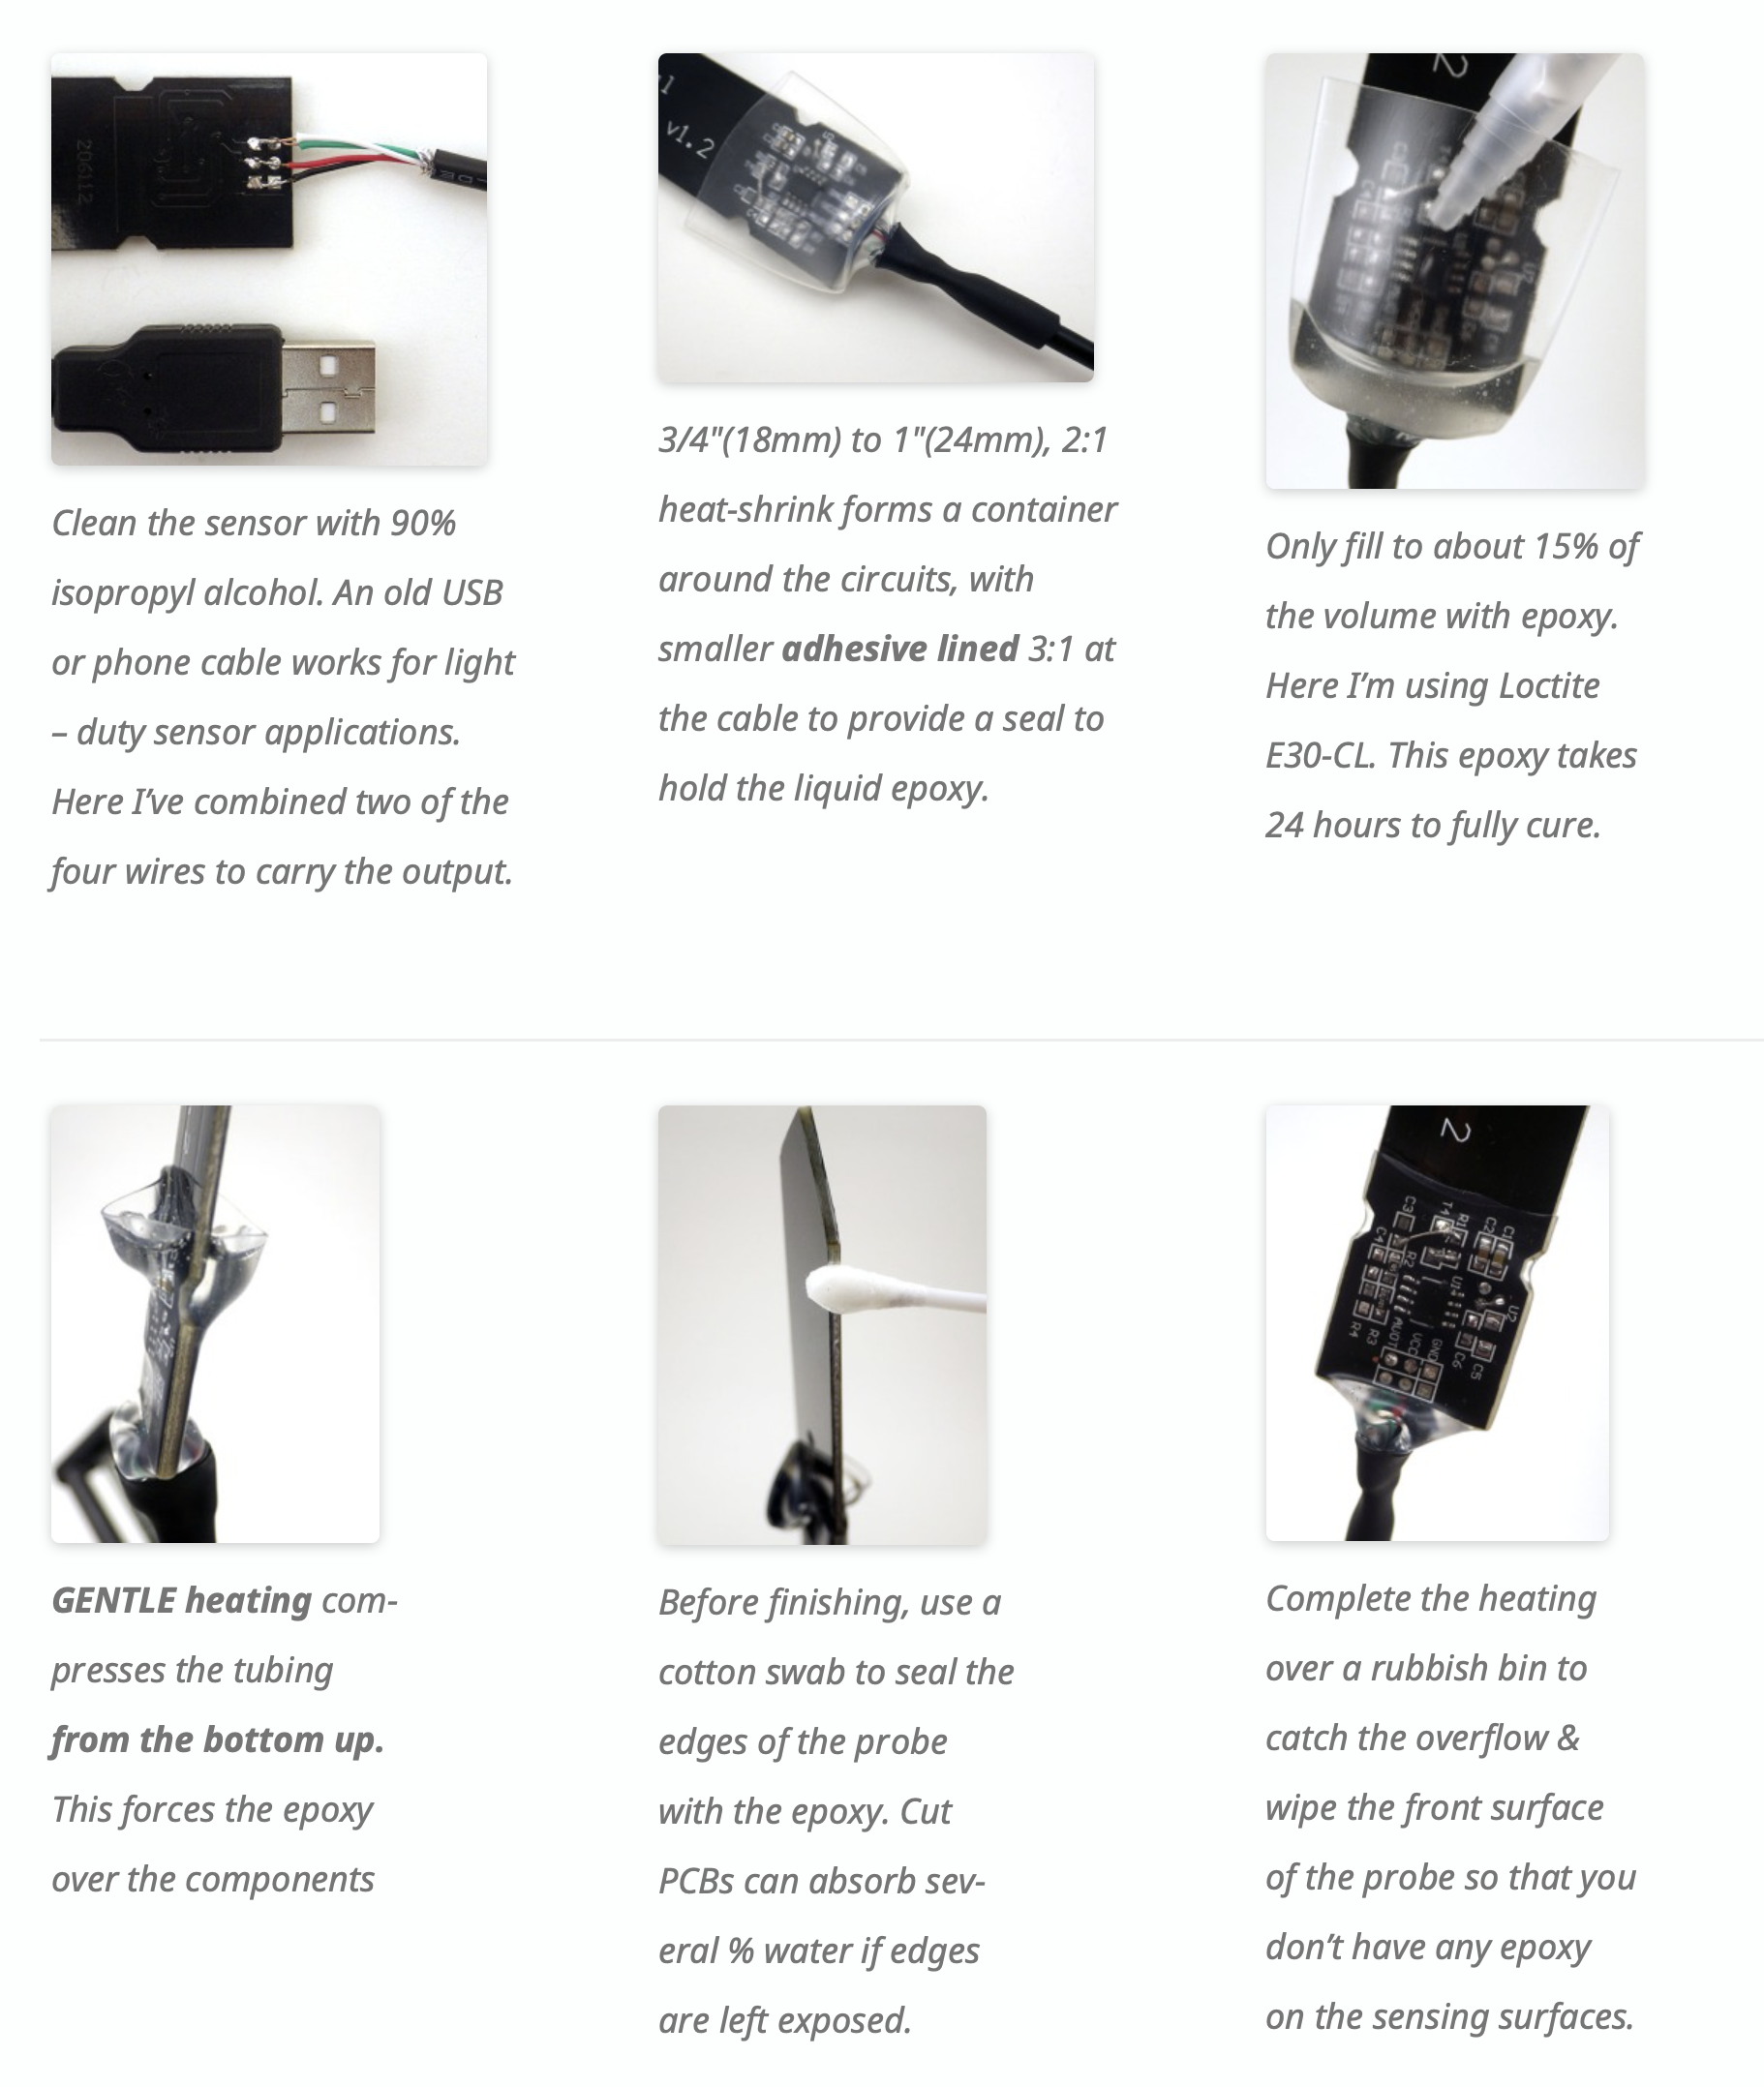
Weather/environmental sealing of the capacitive soil mooisture sensor: https://thecavepearlproject.org/2020/10/27/hacking-a-capacitive-soil-moisture-sensor-for-frequency-output/ (see image below). The article also decribes hacking the device for frequency output.
Comparison of soil sensors and some tips: https://arduinodiy.wordpress.com/2020/08/
Technical Specs
Datasheet